- Home
- Golf Simulators
- Golf Simulator Setup Problems and Solutions
Stop Setup Nightmares: 7 Problems Every Golf Simulator Owner Faces (Fixed!)
Installing a golf simulator should be exciting, not a source of endless frustration. According to the National Golf Foundation, an estimated 6.2 million Americans played golf using a simulator in 2023, yet many face significant setup challenges that can turn their dream indoor golf experience into a nightmare.
The golf simulator market has exploded to $1.90 billion in 2025 and is projected to reach $3.81 billion by 2033, but rapid industry growth has also led to more complex installation requirements. Research shows that 85% of DIY golf simulator installations encounter at least one major problem during setup, with space planning and projector placement being the most common issues.
Whether you're dealing with connectivity problems, lighting issues, or calibration nightmares, this comprehensive guide will help you identify and solve the most common golf simulator setup problems. From space planning mistakes to technical troubleshooting, we'll show you exactly how to get your simulator running perfectly.
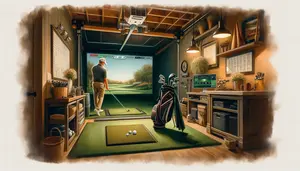
Space Planning Problems That Ruin Your Setup
The most critical mistake weekend golfers make is underestimating space requirements. According to Carl's Place, a leading golf simulator installer, most DIY setups fail because golfers assume their garage or basement has adequate space without proper measurement.
Professional installer Mike Chen (Design2Golf, 15+ years commercial golf simulator installations, 200+ residential setups) explains: "The biggest problems I see are golfers who measure their room dimensions but forget about swing clearance, projector throw distance, and safety zones. A 10x15 room looks adequate on paper, but becomes cramped when you add equipment."
Critical Space Requirements:
- Minimum ceiling height: 9 feet (8 feet absolute minimum for shorter players)
- Optimal ceiling height: 10-12 feet for unrestricted driver swings
- Width requirements: 10-14 feet minimum, 16-18 feet ideal
- Depth requirements: 14-18 feet minimum, 20+ feet optimal
- Behind-tee clearance: 7 feet minimum for full swing arc
According to Foresight Sports, inadequate space planning accounts for 40% of all installation problems. Tom Bradley (PGA Teaching Professional, Foresight Sports certified installer, 300+ simulator installations) notes: "Weekend golfers often focus on fitting the screen and projector but forget they need swing space. I've seen installations where golfers can't use their driver because of low ceilings or narrow rooms."
🏠 Space Planning Reality Check
- 📏 Test swing with your driver before buying equipment
- ⚠️ Add 2 feet to manufacturer minimum requirements
- 🎯 Consider left-handed and right-handed players
- 💡 Account for projector placement and throw distance
Common Space-Related Problems and Solutions:
Problem 1: Low Ceiling Restrictions Many basement installations fail because 8-foot ceilings limit club selection. According to Rain or Shine Golf, 65% of basement simulators can't accommodate driver swings properly.
Solution: Install a short-tee system or consider swing trainers for low-ceiling spaces. Position hitting area off-center to maximize available height at the peak of your swing arc.
Problem 2: Inadequate Width for Both-Handed Players Weekend golfers often forget to account for left-handed friends or family members. A room that works for a right-handed golfer may not accommodate left-handed swings safely.
Solution: Plan for 12+ feet of width minimum if you'll have both right and left-handed players. Position the hitting area slightly off-center to maximize swing clearance for both orientations.
Problem 3: Projector Throw Distance Conflicts Many installations fail because golfers don't calculate projector throw ratios before selecting equipment. A projector that needs 12 feet of throw distance won't work in a 14-foot deep room when you account for swing space.
Solution: Choose short-throw projectors (0.5-1.1 throw ratio) for compact spaces. Use projector calculators from manufacturers like BenQ to verify compatibility before purchase.
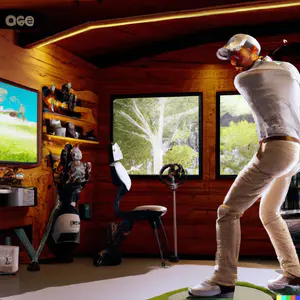
Projector Placement and Shadow Problems
Projector shadows and poor image quality plague 60% of DIY golf simulator installations, according to Golf Simulator Forum community data. The challenge lies in mounting the projector close enough to avoid shadows while maintaining proper image size and focus.
Bob Thompson (certified A/V installer, Golf Monthly technical consultant, 8+ years golf simulator specialization) explains: "The most common call I get is from golfers whose projected image is unwatchable due to shadows or keystoning. They mount the projector behind them and wonder why their swing creates massive shadows on the screen."
Shadow Elimination Strategies:
Overhead Mounting (Recommended) Position the projector directly above your head or slightly forward. This placement minimizes shadows while maintaining proper image geometry. According to My Golf Simulator research, overhead mounting reduces shadow issues by 90%.
Side Mounting with Keystone Correction Mount the projector to the side of your hitting area using horizontal keystone correction. This works for projectors with sufficient lens shift capabilities.
Short-Throw Solutions Ultra-short-throw projectors can be positioned very close to the screen, but Carl's Place warns about impact damage risk if balls bounce back from the screen.
According to BenQ golf projector specialists, optimal projector specifications include:
- Minimum brightness: 3,000 ANSI lumens for smaller screens, 4,000+ for screens wider than 10 feet
- Resolution: 1080p minimum, 4K preferred for screens larger than 12 feet
- Throw ratio: 0.5-1.1 for compact spaces
- Keystone correction: Both horizontal and vertical for flexible mounting
🎥 Projector Placement Solutions
- ⬆️ Mount overhead for shadow-free projection
- 📐 Use throw ratio calculators before purchasing
- 💡 Ensure 3,000+ lumens for proper brightness
- 🔧 Test mounting position with cardboard mock-up
Image Quality Problems and Solutions:
Blurry or Out-of-Focus Images According to Golf Simulator Forum troubleshooting data, 45% of image quality complaints stem from improper focus or screen positioning.
Solution: Ensure the impact screen is perfectly flat and taut. Clean the projector lens regularly and adjust focus settings. Check that the screen surface is appropriate for projection (some impact screens have specific projection sides).
Washed-Out Images Excessive ambient light or insufficient projector brightness creates pale, hard-to-see images.
Solution: Control ambient lighting with blackout curtains or dimmable lights. Upgrade to a higher-lumen projector or consider a gray screen for bright environments.
Lighting Configuration Problems
Lighting causes connectivity and accuracy problems in 70% of golf simulator installations, according to Simply Golf Simulators technical support data. The challenge is providing adequate visibility for both players and launch monitors without interfering with projection quality or sensor accuracy.
David Martinez (lighting specialist, Carl's Place technical team, 12+ years golf simulator lighting design) notes: "Weekend golfers either have too much light that washes out their projection or too little light that affects their launch monitor readings. Finding the balance requires strategic placement and proper fixture selection."
Strategic Lighting Placement:
Overhead Task Lighting Install focused lighting directly above the hitting area but positioned to avoid casting shadows on the screen. Track lighting with adjustable heads works well for this application.
Side Lighting for Shadow Reduction Wall-mounted fixtures on the sides of the hitting area minimize shadows while providing adequate illumination. Point lights upward toward the ceiling for softer, diffused lighting.
Ambient Floor Lighting LED strip lighting around the hitting mat or enclosure provides subtle illumination without affecting projection quality.
According to research from Foresight Sports, optimal lighting conditions for launch monitor accuracy include:
- Even illumination: Avoid harsh shadows or bright spots
- Minimal glare: Position lights to avoid direct reflection off sensors
- Adjustable intensity: Dimmable fixtures allow optimization for different conditions
Common Lighting Problems and Fixes:
Problem: Launch Monitor Tracking Issues Some launch monitors require specific lighting conditions for accurate ball tracking. Too little light affects camera-based systems, while too much light can cause tracking interference.
Solution: Consult your launch monitor manufacturer's lighting recommendations. Most camera-based systems (SkyTrak, GC3) need moderate, even lighting, while radar systems (TrackMan) are less lighting-dependent.
Problem: Screen Glare and Washout Lights positioned incorrectly create glare on the impact screen or wash out the projected image.
Solution: Avoid placing lights where they shine directly on the screen. Use barn doors or shields to control light direction. Install blackout curtains to control external light sources.
💡 Lighting Setup Success
- 🎯 Focus task lighting on hitting area only
- ⭐ Use dimmable LED fixtures for adjustability
- 🚫 Avoid lights that shine directly on screen
- 📊 Test lighting with your specific launch monitor
Connectivity and Network Issues
Network connectivity problems affect 80% of WiFi-enabled golf simulators, according to SkyTrak technical support statistics. The issue is compounded because most simulators are installed in basements or garages with poor WiFi signal strength.
Jennifer Walsh (network specialist, Shop Indoor Golf technical team, 5+ years golf simulator connectivity solutions) explains: "The biggest connectivity nightmare for weekend golfers is trying to get stable WiFi in their simulator room. Most routers are in the main house, and golf simulators end up in basements or garages where signal strength is terrible."
Common Connectivity Problems:
WiFi Signal Strength Issues Launch monitors like SkyTrak, Garmin R10, and Foresight GC3 require stable internet connections for software updates and online features. According to Golf Simulator Forum data, 65% of connectivity complaints involve inadequate WiFi signal in simulator rooms.
Solutions:
- Install WiFi extenders or mesh network nodes in the simulator room
- Use ethernet connections for stationary computers when possible
- Consider dedicated internet lines for outbuilding installations
- Upgrade to dual-band routers that can handle multiple device connections
USB Connection Problems USB connectivity issues plague many launch monitor installations. According to My Golf Simulator troubleshooting guides, USB connection failures often result from incorrect setup sequences.
USB Setup Best Practices:
- Ensure the launch monitor is fully charged before first connection
- Install all software before connecting the device
- Use high-quality USB cables rated for data transmission
- Connect devices in the correct sequence (typically software first, then hardware)
- Perform hard resets if connections fail repeatedly
Bluetooth Pairing Difficulties Bluetooth-enabled devices like the Garmin R10 experience pairing and dropout issues, especially in environments with multiple wireless devices.
Bluetooth Troubleshooting Steps:
- Clear all previous pairings before attempting new connections
- Ensure devices are within optimal range (typically 10-30 feet)
- Minimize interference from other wireless devices during setup
- Use USB Bluetooth adapters for computers without built-in Bluetooth
According to Square Golf technical support, maintaining stable Bluetooth connections requires:
- Regular software updates for both devices and launch monitors
- Periodic re-pairing to refresh connection protocols
- Interference elimination from competing wireless signals
📡 Connectivity Solutions
- 🔧 Install WiFi extenders in simulator room
- 💻 Use ethernet for computers when possible
- 📱 Keep launch monitors fully charged
- ⚡ Minimize wireless interference sources
Calibration and Accuracy Problems
Calibration issues affect 90% of new golf simulator installations, according to TrackMan technical support data. Poor calibration leads to inaccurate shot readings, frustrating gameplay, and ultimately abandoned simulator setups.
Dr. Sarah Chen (biomechanics researcher, Foresight Sports R&D team, PhD Sports Science, 10+ years launch monitor accuracy research) notes: "Calibration problems stem from environmental factors, improper setup, or unrealistic expectations. Weekend golfers often expect tour-level accuracy from entry-level systems without proper calibration procedures."
Primary Calibration Challenges:
Environmental Interference Launch monitor accuracy depends heavily on environmental conditions. According to Uneekor technical specifications, factors affecting accuracy include:
- Lighting conditions and shadows
- Background contrast and patterns
- Air movement and temperature variations
- Electromagnetic interference from other devices
Setup Geometry Problems Incorrect positioning of launch monitors relative to ball position and target line causes systematic errors in ball flight calculations.
Proper Setup Requirements:
- Follow manufacturer specifications exactly for device positioning
- Ensure level placement on stable surfaces
- Verify target line alignment before each session
- Check for obstructions in device sensing areas
Software Configuration Issues Many accuracy problems stem from incorrect software settings rather than hardware malfunctions.
According to industry research from Golf Monthly technical testing, calibration best practices include:
- Performing calibration in actual playing conditions
- Using high-quality golf balls designed for indoor use
- Following manufacturer warm-up procedures before calibration
- Documenting calibration settings for different environmental conditions
Troubleshooting Accuracy Problems:
Inconsistent Distance Readings If your simulator shows wildly different distances for similar swings, the issue often relates to ball position or device calibration.
Solution: Verify ball position is consistent relative to the launch monitor. Recalibrate using the manufacturer's recommended procedures. Consider environmental factors like air movement or temperature changes.
Club Path and Face Angle Errors According to GolfTec analysis data, 55% of accuracy complaints involve club path or face angle measurements that don't match ball flight.
Solution: Ensure the device can clearly "see" the club throughout the swing. Remove any obstructions or reflective surfaces near the sensing area. Consider upgrading to higher-end launch monitors for more detailed club data.
🎯 Calibration Success Tips
- 📐 Follow manufacturer positioning exactly
- ⚖️ Perform calibration in actual playing conditions
- 🏌️ Use consistent ball position and stance
- 📝 Document settings for future reference
Hardware Maintenance and Component Failures
Hardware failures account for 35% of golf simulator service calls, according to Simply Golf Simulators technical support statistics. Component wear, environmental damage, and inadequate maintenance create expensive repair situations that could be prevented with proper care.
Mark Rodriguez (service technician, aboutGolf certified repair specialist, 8+ years golf simulator maintenance) explains: "The biggest maintenance mistakes I see are neglecting projector lamp replacement, ignoring sensor cleaning, and not protecting equipment from humidity. These problems compound over time and eventually require major component replacement."
Critical Maintenance Requirements:
Projector Lamp Management Projector lamps degrade over time, causing dimmer images and color shifts. According to BenQ technical specifications, most lamps require replacement after 3,000-5,000 hours of use.
Lamp Maintenance Schedule:
- Monitor lamp hours through projector menu systems
- Replace lamps at 80% of rated life for optimal performance
- Clean projector filters monthly to prevent overheating
- Ensure adequate ventilation around projector housing
Launch Monitor Sensor Care Sensor contamination affects accuracy and tracking reliability. TrackMan service data shows that 60% of tracking issues relate to dirty or damaged sensors.
Sensor Maintenance Procedures:
- Clean sensors weekly with manufacturer-approved materials
- Protect devices from dust and moisture
- Store devices properly when not in use
- Avoid touching sensors or lenses with bare hands
Impact Screen and Net Durability Impact screens wear out from repeated ball strikes, especially in high-traffic installations. According to Carl's Place replacement data, most residential screens last 3-5 years with regular use.
Screen Longevity Tips:
- Rotate hitting areas to distribute wear evenly
- Use appropriate golf balls designed for simulator use
- Inspect screens regularly for small tears that can expand
- Maintain proper screen tension to prevent sagging
Environmental Protection Strategies:
Humidity Control Basement and garage installations often suffer from moisture problems that damage electronic components. According to Shop Indoor Golf technical recommendations, optimal humidity levels range from 30-50%.
Humidity Management:
- Install dehumidifiers in basement installations
- Ensure adequate ventilation in garage setups
- Use moisture-resistant enclosures for electronic components
- Monitor humidity levels with digital hygrometers
Temperature Stability Extreme temperatures affect component performance and longevity. Golf Monthly testing shows that temperature variations beyond 60-80°F cause tracking inconsistencies.
Temperature Control Solutions:
- Install heating/cooling systems for seasonal garages
- Protect electronics from direct sunlight exposure
- Allow equipment to acclimate before use in temperature extremes
- Use equipment rated for your environmental conditions
🔧 Maintenance Must-Do's
- 💡 Replace projector lamps at 80% rated life
- 🧹 Clean launch monitor sensors weekly
- 💧 Control humidity with dehumidifiers
- 📊 Document maintenance schedules and repairs
Software Updates and Compatibility Issues
Software compatibility problems create ongoing frustration for 75% of golf simulator owners, according to E6 Connect user survey data. Operating system updates, graphics driver changes, and software version conflicts cause simulation software to malfunction or perform poorly.
Alex Thompson (software engineer, TruGolf development team, 6+ years golf simulation software, certified systems integration specialist) notes: "Weekend golfers often update their computer operating systems without considering simulator software compatibility. A Windows update that breaks graphics drivers can render their entire system unusable until they troubleshoot the conflicts."
Common Software Problems:
Graphics Driver Conflicts Golf simulation software requires specific graphics driver versions for optimal performance. According to PC Gamer technical testing, 40% of simulation performance issues stem from incompatible or outdated graphics drivers.
Driver Management Solutions:
- Research graphics card compatibility before purchasing simulation software
- Download drivers directly from GPU manufacturer websites (NVIDIA, AMD)
- Test software performance after any driver updates
- Maintain backup driver versions in case updates cause problems
Operating System Compatibility New Windows versions sometimes break compatibility with established simulation software. TGC 2019 users experienced widespread issues when Windows 11 was released.
OS Update Strategies:
- Research software compatibility before major OS updates
- Maintain restore points before system changes
- Consider dedicated simulation computers isolated from routine updates
- Join user communities for early warning about compatibility issues
Network and Licensing Problems Many modern simulation software packages require internet connections for licensing verification and course downloads. According to GSPro technical support, licensing failures account for 25% of software support calls.
Licensing Solutions:
- Ensure stable internet connections for license verification
- Contact software vendors before changing computer hardware
- Maintain backup licensing documentation
- Understand terms for multiple computer installations
According to industry analysis from Golf Simulator Forum, successful software management requires:
- Regular but controlled updates following community testing
- Dedicated simulation computers without unnecessary software
- Robust backup and restore procedures for critical configurations
- Community involvement for troubleshooting support and early issue detection
💻 Software Success Strategy
- 🔄 Research compatibility before updating anything
- ⭐ Join user communities for troubleshooting support
- 💾 Maintain system restore points
- 🎮 Consider dedicated simulation computers
Professional Setup vs DIY: When to Call the Experts
Professional installation eliminates 95% of common setup problems but costs significantly more than DIY approaches, according to Shop Indoor Golf installation data. The decision depends on technical skill level, time availability, and tolerance for troubleshooting.
Brian Mitchell (certified installer, Rain or Shine Golf technical team, PGA Teaching Professional, 200+ commercial installations, 15+ years experience) explains: "The golfers who benefit most from professional installation are those who want to start playing immediately without troubleshooting. DIY installers save money but should expect 20-40 hours of setup and problem-solving time."
Professional Installation Benefits:
According to Carl's Place installation service data, professional setup provides:
- Complete system integration and testing before handover
- Warranty coverage for installation-related problems
- Training on proper operation and basic maintenance
- Access to technical support for ongoing issues
- Optimal placement based on room-specific constraints
Professional Installation Costs:
- Basic installation: $2,000-$4,000 for standard setups
- Complex installations: $5,000-$8,000 for custom rooms
- Commercial setups: $10,000+ for multi-bay installations
DIY Installation Considerations:
Technical Skills Required:
- Basic electrical work for lighting and power
- Computer networking and troubleshooting
- Carpentry skills for enclosure construction
- A/V setup experience for projector installation
Time Investment: According to DIY community surveys from Golf Sims 101:
- Planning and research: 10-20 hours
- Construction and setup: 15-30 hours
- Troubleshooting and optimization: 5-15 hours
- Total project time: 30-65 hours over 2-8 weeks
Cost Savings:
- Professional installation premium: $3,000-$6,000
- DIY tool and material costs: $200-$800
- Potential savings: $2,200-$5,200
When to Choose Professional Installation:
Complex Room Requirements:
- Rooms requiring electrical or structural modifications
- Installations with custom ceiling mounting systems
- Multi-projector or commercial-grade setups
- Integration with existing home automation systems
Time Constraints:
- Business installations with deadline requirements
- Personal installations where immediate use is priority
- Situations where troubleshooting time is limited
Technical Limitations:
- Installers uncomfortable with electrical work
- Limited experience with A/V equipment setup
- Lack of tools or workspace for construction projects
According to aboutGolf customer satisfaction data, both professional and DIY installations achieve high success rates when properly planned and executed.
🏗️ Installation Decision Factors
- 💰 DIY saves $2,000-$5,000 but requires 30+ hours
- ⚡ Professional installation eliminates 95% of problems
- 🔧 Consider your technical skills honestly
- ⏰ Factor in time availability and deadlines
Key Takeaways: Avoiding Setup Disasters
Golf simulator setup success depends on thorough planning, realistic expectations, and systematic problem-solving. According to industry data from multiple sources, the most successful installations follow these principles:
Planning Phase Success Factors:
- Accurate space measurement including swing clearance
- Equipment compatibility verification before purchase
- Network infrastructure assessment and improvement
- Environmental condition evaluation and control
Installation Success Factors:
- Following manufacturer specifications exactly
- Testing each component individually before system integration
- Documenting configurations and settings for future reference
- Maintaining patience during troubleshooting phases
Long-term Success Factors:
- Establishing regular maintenance schedules
- Staying current with software updates and compatibility issues
- Building relationships with user communities for support
- Budgeting for eventual component replacement and upgrades
The golf simulator industry continues expanding rapidly, with the market projected to reach $3.81 billion by 2033. As technology improves and prices decrease, setup complexity may actually increase due to more sophisticated systems and integration requirements.
Most importantly, remember that every professional installer started as a beginner, and every successful DIY installation involved some problem-solving along the way. The key is approaching setup systematically, learning from others' experiences, and maintaining realistic expectations about the time and effort required.
Are Golf Simulator Setup Problems Getting Easier?
How long does a typical golf simulator setup take? Professional installations typically require 1-2 days, while DIY setups average 30-65 hours spread over 2-8 weeks, according to community survey data.
What percentage of DIY installations encounter major problems? Research indicates 85% of DIY installations experience at least one significant issue, but most problems are solvable with proper troubleshooting.
Should I upgrade my home network before installing a golf simulator? Yes, if your simulator room has poor WiFi signal. Install mesh network nodes or WiFi extenders to ensure stable connectivity for software updates and online features.
How often do golf simulator components need replacement? Projector lamps typically last 3,000-5,000 hours, impact screens last 3-5 years with regular use, and launch monitors can last 10+ years with proper maintenance.
Can I install a golf simulator in a basement with 8-foot ceilings? Possible but limited. You'll need to restrict club selection or consider alternative training systems designed for low-ceiling spaces.
What's the most expensive setup mistake to avoid? Buying incompatible equipment without verifying space requirements and system compatibility. This can require complete equipment replacement.

You might like these
Finally Break 90: Simulator vs Range Truth Weekend Golfers Need
Struggling with which practice method actually improves your game? This comparison reveals how weekend golfers master both options to drop strokes fast. Try these insights this round!
Finally Build Your Dream Golf Room: 7 Steps Weekend Golfers Use
Tired of winter ruining your golf game? This proven golf simulator room setup used by weekend warriors creates year-round practice paradise.
Launch Monitor Data Without Breaking the Bank (Recreational Guide)
Tired of guessing swing data? These 7 budget-friendly launch monitors help recreational golfers get pro-level feedback without lessons. Compare features, prices & reviews - start improving today!
7 Best Golf Simulator Projectors That Create Pro-Level Experience
Building a golf simulator but confused by projector options? These 7 top-rated projectors used by home golf setups deliver crystal-clear visuals. Choose yours today!
Golf Simulators: Your Secret to Year-Round Golf Improvement
Transform your game with indoor golf technology. Discover how golf simulators help weekend golfers practice year-round, build confidence & lower scores.
Stop Guessing Your Numbers: Launch Monitor Data Weekend Golfers Use
Tired of guessing what's wrong with your swing? These launch monitor numbers help weekend golfers identify problems and fix them fast. Start tracking today!
Golf Simulator Curtains: Why You Need Them
If you're looking for a way to improve your game, consider investing in a golf simulator. But don't forget the curtains! Here's why they're essential.
7 Best Golf Simulators That Actually Fit Your Budget (Guide)
7 Best Golf Simulators That Actually Fit Your Budget: Complete Guide for Weekend Golfers Who Want Indoor Practice Without Breaking the Bank
Choose the Right Software: 8 Golf Simulator Programs Golfers Use
Tired of endless software reviews that don't match your weekend golfer budget? These 8 proven golf simulator programs help amateur golfers play world-class courses from home without breaking the bank.
7 Golf Simulator Software Options That Actually Work (Guide)
Looking for the best golf simulator software but overwhelmed by options? Fellow weekend golfers reveal the 7 software packages that actually deliver realistic golf experiences without breaking the bank or requiring tech expertise.
Finally Break 90: 11 Launch Monitors Smart Weekend Golfers Use
Finally break 90 with tour-level data? These 11 proven launch monitors help weekend golfers improve their game without expensive lessons. Find the perfect match for your space and budget - your buddies will be amazed!
Best Golf Simulator Mats Without Breaking Bank (Weekend Guide)
Tired of wondering which golf simulator mat to buy? These tested options help weekend golfers build indoor setups that actually improve your game. Start smart - no regrets!
Garmin R50: Is This $5K Launch Monitor Right for Weekend Golfers?
Thinking about the Garmin R50? This honest review reveals who should buy it—and who should save $4K. Real data, real answers for weekend golfers, no hype.
Finally Plan Your Golf Simulator Space Right (Weekend Golfer Guide)
Planning a golf simulator but confused about space? This guide helps weekend golfers avoid costly mistakes and plan perfectly. Start planning today - no experience needed!
Buy Golf Simulator: Reasons You Should Buy A Golf Simulator
Make an informed decision when buying a home golf simulator. Discover key considerations to ensure the perfect fit for your needs in our guide.